As the weather continues to cool down, the leaves are changing, and they are prime for making some great crafts! I have put together 3 different crafts that you can easily do at home. This activity will also help you check off yet another item off of Macaroni Kid West Omaha’s Fall Bucket List. If you still haven’t printed it out, get it HERE.
Now we all have our own time and patience we are willing to put forth when it comes to crafts and our kids. You do you here Mama (or Dad). You do what you are comfortable and know that no matter what it is, you are spending time together being creative and that is all that matters!
If you really want to make a day of it, you can use our Nature Scavenger Hunt printable to collect an assortment of fall treasures. Then when you get home you can turn them into one of the crafts below!
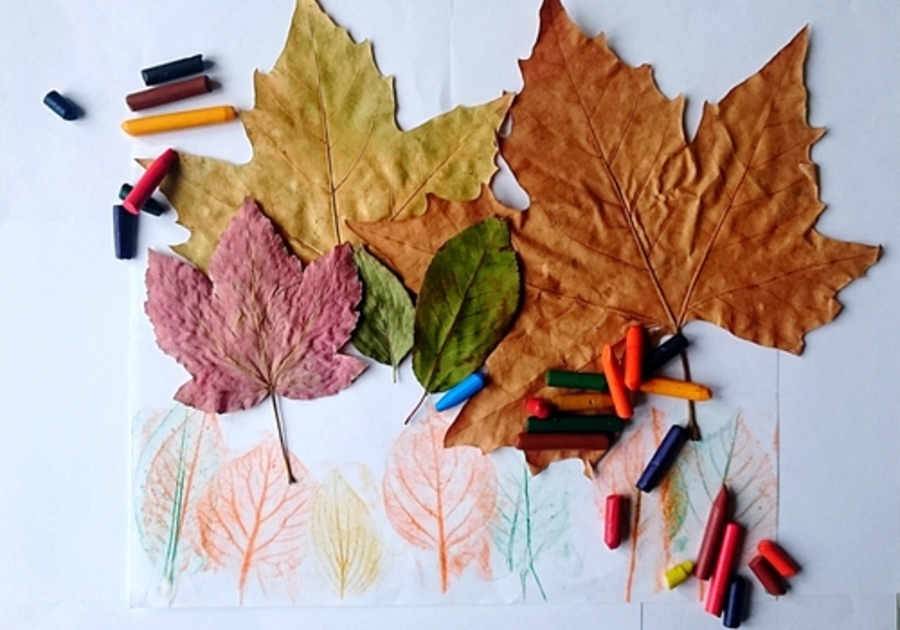
| Craft 1 – Leaf Rubbings (level easy, low stress/low mess) Once you have collected some leaves, gather white paper and any broken crayons you have lying around. Take a leaf, place it under the paper, and rub with the side of the crayon. Voila! You have just mastered the time-honored tradition of leaf rubbings. You can switch out for different leaves and do rubbings next to each other or let them slightly overlap to create a fun and whimsical collage. | 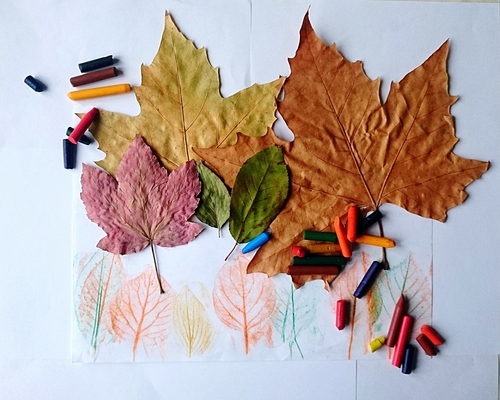 |
| Craft 2 – Painting with Leaves (level medium, moderate stress/moderate mess) With this craft, you will want multiple styles of leaves and various colors of paint. Whatever paint you have on hand will do. I would recommend using a heavier stock of paper, so the paint doesn’t soak through. Construction paper would be a great option. Once you have your leaves, spread them out in front of you and place them so their “underside” or the side with all the bumpy veins is facing up. Choose a leaf and lightly brush some paint onto one area of it. Careful to only apply a light coat of paint, otherwise the veins and other characteristics of the leaf will not show through on the transfer. Then choose one or more additional colors and brush them onto the other areas of the leaf. Gently pick up your leaf and place it on your paper with the paint side down. Softly push down to transfer the paint from the leaf to the paper. You can use the same leaf again or you can try a new one. You will slowly build a beautiful kaleidoscope of fall color. |  |
| Craft 3 – Decoupage with Leaves (level hard, additional stress/additional mess) This craft you will need a little bit of planning, just to make sure you have all the items you need. For this project you will need a glass votive, mason jar, or other item of your choosing. A flameless tealight. Rubber bands. Mod podge and a brush. And of course, leaves. First, apply a thin coat of Mod podge over the outside of your votive, jar, etc; so the whole outside is sticky. Then, place two rubber bands on around your holder, one near the top and one near the bottom. For a larger holder, you may want to add one to two more rubber bands in-between. Finally, take your leaves and place them on the jar, using the rubber band to hold them in place. Next, take your Modpoge and apply liberally, until leaves are completely coated and sticking to your holder. Let dry according to Modpoge directions. When the glue is no longer wet, but still tacky, remove the rubber bands. When the leaves are completely dry, place flameless candle inside and you now have a new fall nightlight for your kiddos room! | 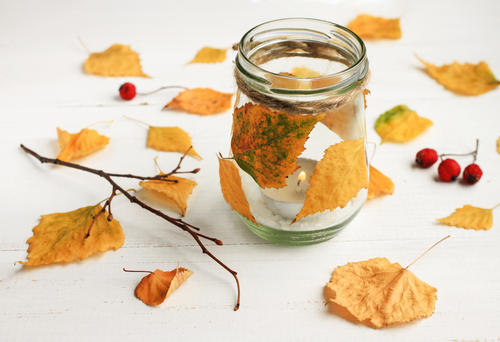 |